Edit & Post Batch/Fill Tickets
The following procedure assumes that batch tickets & fill tickets have already been created using the combined method
1. Edit the batch ticket by either
a. (130) Cut Production Tickets: recall the batch and click on the <Edit> button
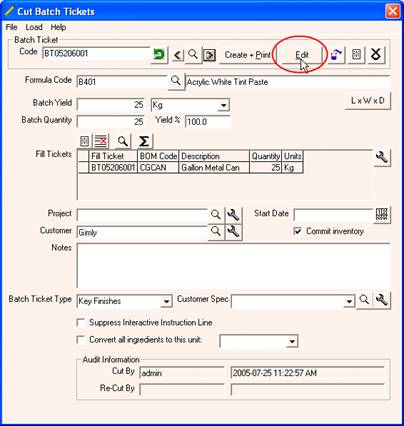
b. (145) Batch Edit and Close

2. Optional: on the <General> tab enter the number of hours associated with the batch, assign a customer and enter any notes
3. On the <Batch Input> tab you will need to verify quantities, enter lot numbers (if you lot track) and input any changes or additions.
a. To change the quantity used, you can either change the “Actual Quantity” column, or enter any additions to the “Addition” column(s).
b. The amount that appears under the “Total Added” column is the amount that will be deducted from inventory.
c. To add a new raw material to the batch, position the cursor on a line and click the insert button. Once the new line is inserted you may enter the new raw material codedescription and quantity. This will NOT change the master formula. Only the batch will be effected by any changes you make
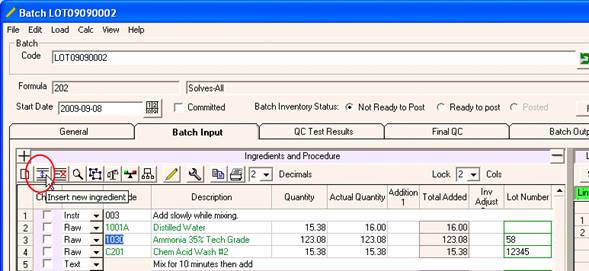
d. Lot numbers must be entered for items that are lot tracked. Lot tracked items will appear in green. Available lots will appear in a window to the right for each raw material line you click on. To assign a lot, simply double-click on the lot number in the window to your right. If the lot number you desire does not appear in the window, you can manually type the lot number in under the “lot number” column although we recommend you adjust inventory instead (use the inventory module).

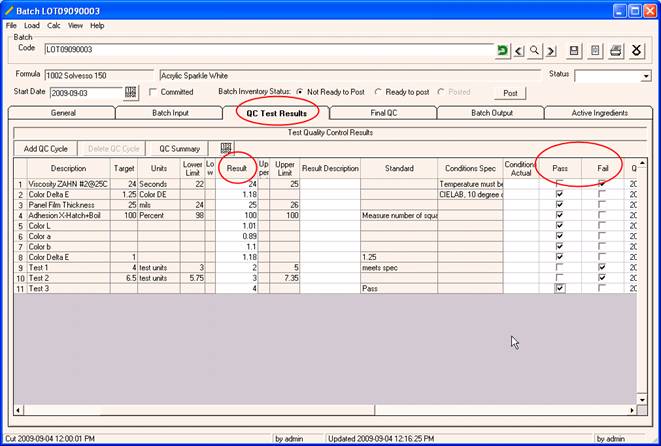
4. Optional: On the <QC Results> tab enter the QC results and indicate pass/fail for each test
5. Optional: On the <Final QC> tab, indicate “Approved” or “Rejected”. This is required if you plan on printing Certificates of Analysis

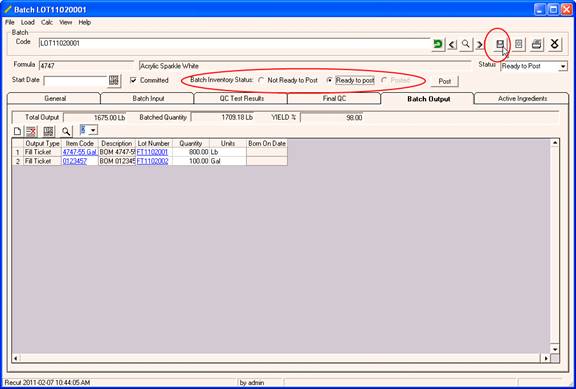
6. On the <Batch Output> Tab, verify the quantities produced. Check the Yield % for reasonableness. The items on this tab will increase when the batch is posted.

7. Once you are satisfied that all data has been entered, check off “Ready To Post” and save the record.
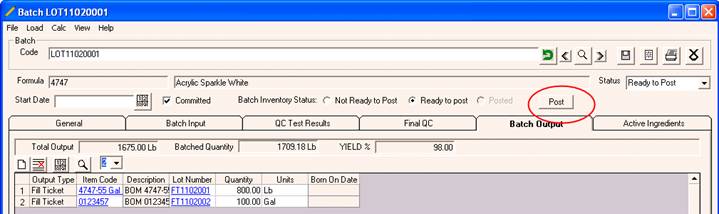
8. Repeat steps 1 – 7 for any other batches that are ready to post. After you have saved the last record, click on the <Post> button to Post all the batches
=
9. Click <Begin Posting> to start the posting process.
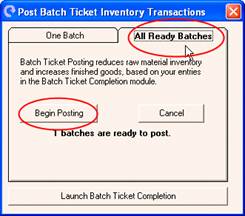
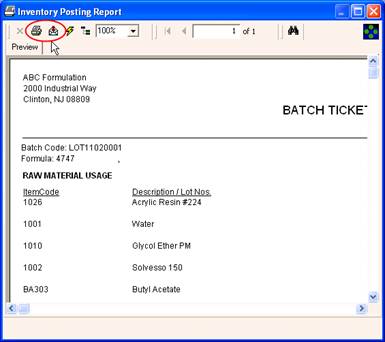
10. Once completed, a report will be displayed. You may print the report or export it.